Most recipes for home canned foods will require elevation adjustments to time and/or the processing method.
Can vegetables only in a pressure canner and at the pressure required to reach 240° F for your elevation. At varying elevations, the processing time stays the same, but adjustment to the pounds pressure is required.
Vent all pressure canners 10 minutes before starting the actual canning processing time.
Before tasting or serving, boil all home-canned, low-acid vegetables 10 minutes plus one minute for each 1,000 feet elevation above sea level.
Canning can be an
economical method of preserving vegetables to enjoy throughout the year, and
the nutrient value is often as good or better than fresh produce. National
movements promoting both the environmental and health benefits of consuming
more locallygrown foods has spurred a renewed interest in home gardens,
farmers’ markets and home food preservation, but if not done safely, your
canned foods can become contaminated with the bacteria, Clostridium botulinum, that could make you very sick—or
kill you.
In order to supply
sufficient heat to destroy the botulism-causing bacteria, vegetables must be
processed in a pressure canner at the number of pounds needed to achieve 240°
F. Do not take short cuts in recommended preparation or processing procedures.
Failure to properly process low-acid foods in a pressure canner can allow the
survival of the bacteria that cause botulism. Protect yourself and your family
by knowing and following safe canning methods.
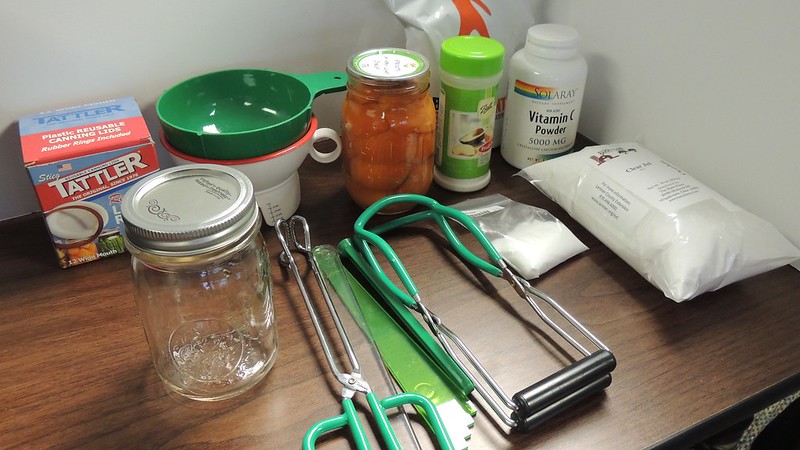
Prepare Equipment and Jars
Pressure canner. Make sure your pressure canner has a tight-fitting
cover, clean exhaust vent (or petcock) and safety valve, and an accurate
pressure gauge. There are two types of pressure gauges: weighted and dial
gauges. Dial gauges need to be checked for accuracy before using but weighted
gauges need only to be cleaned before using. Check gauges each season before
use, more frequently if used often. Contact your Colorado State University
Extension county office for more information about having your gauge checked.
Use a pressure canner
that holds at least 4 quart jars. Smaller pressure canner-saucepans are not
recommended for home canning as they heat up and cool down too quickly to
ensure adequate heat penetration using the processing schedules specified in
this fact sheet.
Canning jars and lids. Discard any jars and closures with
cracks, chips, dents or rust, since defects can prevent an airtight seal. Use
jars designed specifically for home canning. Use only the half-pint, pint and
quart sizes. Wash jars in hot, soapy water and rinse well before using. Keep
the jars hot until they are filled and placed in the canner. This will help
prevent jar breakage. Prepare new metal lids as manufacturer directs (See
Figure 1). Do not use commercial food jars (mayonnaise, pasta sauce, etc.) as
they break easily in pressure canners and may not seal.
Prepare Vegetables
Select only fresh,
young, tender vegetables for canning. The sooner you can get them from the
garden to the jar, the better. For ease of packing and even cooking, sort the
vegetables for size and ripeness. Wash all vegetables thoroughly. Soil often
contains bacterial spores, the form of bacteria which is hardest to destroy.
Don’t let vegetables soak; they may lose flavor and nutrients. Handle them
gently to avoid bruising.
Fill and Close Jars
The hot-pack method is
recommended for all low-acid foods, including vegetables. Some vegetables may
also be packed raw. (See individual directions in Table 1 to determine which
method to use.)
Raw pack. Put cold, raw vegetables into jars and
cover with boiling water. Pack most raw vegetables (except starchy ones) firmly
into the jars. Loosely pack starchy vegetables such as corn, peas and lima
beans, because they expand during processing.
Hot pack. Heat vegetables in water or steam before
packing. Then cover with the boiling cooking liquid or water. Loosely pack the
hot food.
For both hot and raw pack, use enough liquid to fill around and
cover the food. Read the directions for each vegetable for the amount of space
to leave between the top of the food and the top of the jar. This headspace is
important to obtain a good seal.
Salt may be added to
each jar, if desired. Salt is added only for seasoning and does not help
preserve the food. If salt is used, canning salt is recommended to prevent the
liquid from turning cloudy. Use 1/2 teaspoon salt per pint.
To remove any trapped air bubbles, insert a non-metallic spatula between the food and the jar. Slowly turn the jar and move the spatula up and down to allow air bubbles to escape. Add more liquid if necessary to obtain the proper headspace. Wipe the jar rim with a clean damp paper towel to remove any food particles. Place pretreated lid on the jar. Screw on the band fingertip tight.
Process in a Pressure Canner
Read the
manufacturer’s instructions for your pressure canner. General directions for
using pressure canners are as follows:
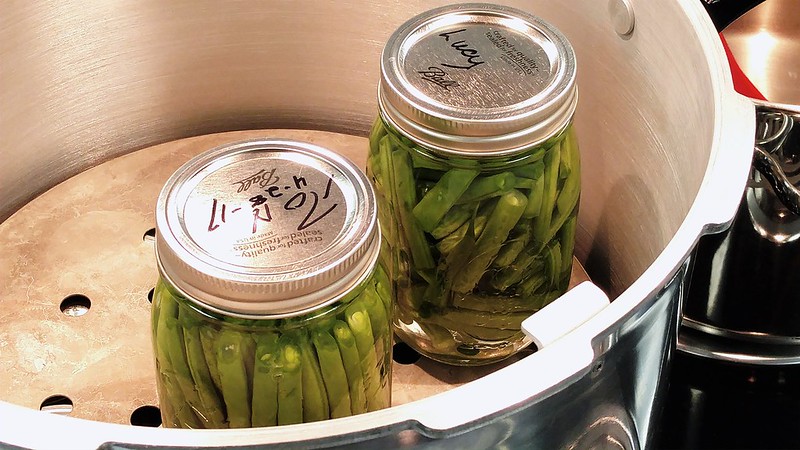
Put 2 to 3 inches of
hot water in the canner. Place filled jars on the rack, using a jar lifter.
Fasten canner lid securely. Leave weight off vent port or open petcock.
Maintaining a high
heat setting, exhaust steam 10 minutes.
Place weight on vent
port or close petcock. The canner will pressurize in the next three to five
minutes.
Start timing the
canning process when the pressure reading on the dial gauge indicates that the
recommended pressure for your altitude has been reached, or when the weighted
gauge begins to jiggle or rock. Regulate heat under the canner to maintain a
steady pressure at or slightly above the correct gauge pressure. Quick and
large pressure variations during processing may cause unnecessary liquid losses
from jars. Weighted gauges should jiggle or rock slowly throughout the process.
When the timed process
is completed, turn off the heat, remove the canner from the heat if possible,
and let the canner depressurize. Do not force-cool the canner by pouring cold
water over it. When the pressure registers zero, wait a minute or two, then
slowly open the petcock or remove weighted gauge. Unfasten the cover and tilt
the far side up so steam can escape away from you.
Carefully remove jars
from canner and place on rack, dry towels or newspapers. Allow jars to cool
untouched, away from drafts, for 12 to 24 hours before testing seals.
Post-Canning
Test the seals on the
jar lids. Press flat metal lids at the center of the lid. Lids should be
slightly concave and not move when pressed. Remove screw bands and wipe jars
with a clean, damp cloth. Label sealed jars with contents, canning method and
date. Store in a clean, cool, dry, dark place.
Treat any unsealed
jars of food as fresh. The food should either be eaten immediately,
refrigerated, frozen or reprocessed. The food can safely be reprocessed if the
unsealed jar is discovered within 24 hours. To re-can, check the jar sealing
surface for tiny nicks and change the jar, if necessary. Repeat the entire
canning process, using a new lid.
On Guard Against Spoilage
Bulging lids or
leaking jars are signs of spoilage. When you open the jar, look for other
signs, such as spurting liquid, an off odor, or mold.
Low-acid canned
vegetables and meats can contain botulism toxin without showing signs of
spoilage. Given the challenges of high altitude food preservation and as an
additional safety precaution, boil all home-canned, low-acid vegetables and
meats before tasting or serving in a saucepan for 10 minutes, plus 1 minute for
each 1,000 feet above sea level (15 minutes at 5,000 feet). If food looks
spoiled, foams, or has an off odor during heating, discard it.
Dispose of all spoiled
home-canned food where it will not be eaten by people or pets. If possible,
boil all spoiled, low-acid canned food for 30 minutes before disposing of it to
destroy any toxin present and prevent its spread.
Table 1: Preparation methods
and processing times for canning in a pressure canner at 240 degrees F.
Elevation Adjustments: The processing times and pressures given are those recommended by the U.S. Department of Agriculture. DO NOT DECREASE the processing times or pressures given. At varying elevations, the PROCESSING TIMES STAY THE SAME, but you must make the following pressure adjustments:
In a Dial Gauge Pressure Canner:
At elevations of 0-2000 feet, process at 11 pounds pressure
At elevations of 2001-4000 feet, process at 12 pounds pressure
At elevations of 4001-6000 feet, process at 13 pounds pressure
At elevations of 6001-8000 feet, process at 14 pounds pressure
At elevations of 8001-10000 feet, process at 15 pounds pressure
In a Weighted Gauge Pressure Canner:>
At elevations of 0-1000 feet, process at 10 pounds pressure
At elevations above 1000 feet, process at 15 pounds pressure
There are NO safe boiling water bath processing times (non-pressurized) for any of the vegetables listed in this fact sheet.
VEGETABLE
PREPARATION & PACK
PROCESSING TIME (min.) PINTS
PROCESSING TIME (min.) QUARTS
Asparagus, spears or pieces
Use tender, tight-tipped, 4-6 inch long spears. Wash and trim off tough scales. Break off tough stems and wash again. Cut in 1-inch pieces or can whole.
Raw Pack — Fill jars with raw asparagus. Pack as tightly as possible, without crushing, to 1 inch of jar tops. Add boiling water, leaving 1-inch headspace.
30
40
Hot Pack — Cover asparagus with boiling water. Boil 2 or 3 minutes. Loosely fill jars with hot asparagus to 1 inch of jar tops. Add boiling water, leaving 1-inch headspace.
30
40
Beans or peas, dry
(all varieties)
Sort and wash dry seeds. Cover with cold water and let stand 12-18 hours in cool place. Drain.
Hot Pack Only — Cover soaked beans with fresh water and boil 30 minutes. Fill jars with beans or peas and cooking water, leaving 1-inch headspace.
75
90
Beans, fresh lima,
butter or shell beans
Can only young, tender beans. Shell beans and wash thoroughly.
Raw Pack — Pack raw beans loosely into jars. For small beans, fill 1 inch from top for pints and 1 1/2 inches for quarts. For large beans, fill 1 inch from top for pints and 1 1/4 inches for quarts. Do not press or shake down. Fill jars with boiling water, leaving 1-inch headspace.
40
50
Hot Pack — Cover with boiling water, bring to a boil. Pack hot beans loosely in jars to 1 inch of jar tops. Cover with boiling water, leaving 1-inch headspace.
40
50
Beans, green, snap,
wax, Italian; pieces
Wash; trim ends. Leave whole or cut or snap into 1-inch pieces.
Raw Pack — Pack beans tightly into jars to 1 inch of jar tops. Add boiling water, leaving 1-inch headspace.
20
25
Hot Pack — Cover beans with boiling water; boil 5 minutes. Fill jars loosely to 1 inch of jar tops. Add boiling water, leaving 1-inch headspace.
20
25
Beets, whole,
cubed or sliced
Sort for size. Cut off tops, leaving tap root and 1 inch of stem. Wash.
Hot Pack Only — Cover with boiling water. Boil until skins slip easily — 15-25 minutes, depending on size. Cool, remove skins, trim off stems and roots. Can baby beets whole. Cut medium and large beets in 1/2-inch slices or cubes, or halve or quarter. Fill jars with hot beets and fresh hot water, leaving 1-inch headspace.
30
35
Carrots,
sliced or diced
Wash, peel and rewash. Baby carrots can be left whole. Slice or dice larger ones.
Raw Pack — Pack carrots tightly into jars to 1 inch of jar tops. Add boiling water, leaving 1-inch headspace.
25
30
Hot Pack — Cover carrots with boiling water. Simmer 5 minutes. Fill jars to 1 inch of jar tops. Add hot cooking liquid, leaving 1-inch headspace.
25
30
Corn, cream-style
Husk corn, remove silk and wash. Blanch ears 4 minutes in boiling water. Cool in ice water. Cut corn from cob at about the center of kernel. Scrape cob.
Hot Pack — To each quart of corn and scrapings in saucepan, add 2 cups boiling water. Boil. Fill pint jars with hot corn mixture, leaving 1-inch headspace.
85
NOT recommended
Corn, whole-kernel
Husk corn, remove silk and wash. Blanch 3 minutes in boiling water. Cool in ice water. Cut from cob at about 3/4 depth of kernel. Do not scrape cob.
Raw Pack — Pack corn in jars, leaving 1-inch headspace. Do not shake or press down. Add fresh boiling water, leaving 1-inch headspace.
55
85
Hot Pack — To each quart of kernels in saucepan, add 1 cup hot water. Heat to boil and simmer 5 minutes. Fill jars with corn and cooking liquid, leaving 1-inch headspace.
55
85
Greens,
including spinach
Sort and wash thoroughly. Cut tough stems and midribs.
Hot Pack Only — Steam greens, 1 lb. at a time, for 3-5 minutes or until wilted. Fill jars loosely with greens. Add fresh boiling water, leaving 1-inch headspace.
70
90
Mixed vegetables
Hot Pack Only – Select your favorite mixture of vegetables, except leafy greens, dried beans, cream-style corn, winter squash or sweet potatoes. Equal portions of carrots , whole kernel sweet corn, green beans, lima beans, tomatoes and diced zucchini make a good mix.) Prepare each vegetable as for canning and cut into desired sizes. Mix together, cover with boiling water and bring back to a boil. Boil 5 minutes. Pack hot vegetables into jars, leaving 1-inch headspace. Add 1/2 teaspoon salt to each pint jar, if desired. Fill jar to 1 inch from top with boiling liquid.
75
90
Mushrooms,
whole or sliced
Select only high quality, small to medium-size domestic mushrooms with short stems. Do not can wild mushrooms. Trim stems and discolored parts. Soak in cold water for 10 minutes to remove dirt. Wash in clean water. Leave small mushrooms whole; cut large ones.
Hot Pack Only — Cover mushrooms with water in a saucepan and boil 5 minutes. Fill jars with hot mushrooms, leaving 1-inch headspace. Add 1/8 teaspoon of ascorbic acid powder or a 500-milligram tablet of vitamin C to each jar to prevent discoloration. Add fresh hot water, leaving 1-inch headspace.
45
NOT recommended
Okra
Hot Pack Only – Wash and trim pods. Cut in 1 inch pieces or leave whole. Pre-cook okra for 2 minutes in boiling water. Drain. Pack into hot jars, leaving 1-inch headspace. If desired, add 1/2 teaspoon salt per pint. Fill to 1 inch from top with boiling water.
Raw Pack — Fill jars with raw peas, add boiling water, leaving 1-inch headspace.
40
40
Hot Pack — Cover peas with boiling water; boil 2 minutes. Fill jars loosely with hot peas. Add cooking liquid, leaving 1-inch headspace.
40
40
Peppers,
hot or sweet
Select firm yellow, green or red peppers. Wash and drain. Small peppers may be left whole. Large peppers may be quartered. Remove cores and seeds. Caution! Wear plastic gloves while handling hot peppers or wash hands thoroughly with soap and water before touching face.
Hot Pack Only — Make 2-4 slits in each pepper. Blanch in boiling water or blister skins by placing peppers in hot oven (400 degrees F) or broiler for 6-8 minutes. Place
blistered peppers in pan, cover with damp cloth. Let cool several minutes, then peel. Flatten whole peppers. Fill jars loosely with peppers to 1 inch of jar tops. Add boiling water, leaving 1-inch headspace.
35
NOT recommended
Potatoes, white;
cubed or whole
Wash, pare. Leave whole if 1-2 inches in diameter or cut into 1/2-inch cubes. Dip potatoes into solution of 1/2 teaspoon ascorbic acid per quart of water to prevent darkening. Drain.
Hot Pack Only — Place potatoes in saucepan and cover with boiling water. Boil cut potatoes for 2 minutes, whole for 10 minutes. Drain. Fill jars with hot potatoes and fresh hot water, leaving 1-inch headspace.
35
400
Pumpkin and winter squash, cubed
Wash; remove seeds and pare. Cut into 1-inch cubes.
Hot Pack Only — Place in saucepan, cover with boiling water. Boil 2 minutes. Do not mash or puree. Fill jars with cubes and cooking liquid, leaving 1-inch headspace.
55
90
Sweet potatoes,
pieces or whole
Choose small to medium-sized potatoes. Wash well.
Hot Pack Only — Boil or steam until partially soft (15-20 minutes). Remove skins. Cut medium potatoes to uniform pieces. Do not mash or puree. Fill jars, leaving 1-inch headspace. Cover with fresh boiling water or syrup, leaving 1-inch headspace.
65
90
Tomatoes
See CSU Extension Fact Sheet 9.341 Canning Tomatoes and Tomato Products.
Vegetable Soup
Hot Pack Only – Choose your favorite vegetable ingredients. Prepare each as 60 75 you would for a hot pack in canning. Cooked meat or poultry can also be added, if desired. Combine ingredients with hot water, broth, or tomatoes and juice to cover. Boil 5 minutes. If dried beans or peas are used, they MUST be rehydrated first. CAUTION: DO NOT thICKEN OR ADD MILK, CREAM, FLOUR, RICE, BARLEY OR OthER GRAINS, NOODLES OR OthER PASTA. These ingredients can slow down the rate of heating and these process times have not been tested for use with soups containing these ingredients. Add salt to taste, if desired. Fill jars halfway with solid mixture. Continue filling with hot liquid, leaving 1-inch headspace.
60
75
Note: Cooked seafood can also be added. If it is, additional processing time will be needed.
100
100
References and Resources
USDA Complete Guide to Home
Canning. U.S. Department of
Agriculture. Information Bulletin No. 539, 2009.
So Easy To Preserve, 5th Edition, 2006. University of Georgia
Cooperative Extension.
*P. Kendall, Ph.D., R.D., Colorado State
Extension food safety specialist and professor emeritus; and E. Shackelton,
Extension assistant, department of food science and human nutrition. 10/99.
Revised 9/13.
Colorado State University, U.S.
Department of Agriculture and Colorado counties cooperating. Extension programs
are available to all without discrimination. No endorsement of products
mentioned is intended nor is criticism implied of products not mentioned.
This website uses cookies so that we can provide you with the best user experience possible. Cookie information is stored in your browser and performs functions such as recognising you when you return to our website and helping our team to understand which sections of the website you find most interesting and useful.
Strictly Necessary Cookies
Strictly Necessary Cookie should be enabled at all times so that we can save your preferences for cookie settings.
If you disable this cookie, we will not be able to save your preferences. This means that every time you visit this website you will need to enable or disable cookies again.
3rd Party Cookies
This website uses Google Analytics to collect anonymous information such as the number of visitors to the site, and the most popular pages.
Keeping this cookie enabled helps us to improve our website.
Please enable Strictly Necessary Cookies first so that we can save your preferences!