by D. Grubb, E. Shackelton, and M. Bunning* (1/21)
Quick Facts…
- Flavored vinegar can enhance salads, marinades, and sauces and may be safely prepared at home.
- Carefully selected ingredients, clean utensils and containers, and good preparation practices help ensure the safety and quality of flavored vinegar.
- Store homemade flavored vinegar in the refrigerator for optimal safety and flavor retention.
Flavored vinegar is fun and easy to make at home. Care needs to be taken when making flavored vinegar because bacteria can be present on the flavoring ingredients and mold spores can contaminate vinegar during the preparation process causing spoilage.
Due to its acetic acid content and phenolic compounds, vinegar can inhibit the growth of most bacteria however, some pathogens that cause foodborne illness can survive in acidic environments. Following the procedures and tips below can help ensure a high quality, safe vinegar.
Making Flavored Vinegar
Equipment
- Containers (pint- or quart-sized glass jars or bottles, depending on recipe)
- Lids and caps (home canning jar lids, metal or plastic screw caps, or corks)
- Bleach
- Large saucepan
- Thermometer
- Cutting board
- Colander
- Chef’s knife or pestle, mallet or muddler
- Food grade skewers (if using vegetables such as jalapeño peppers or garlic cloves)
- Funnel
- Tongs
- Cheesecloth or coffee filters
- Paper towels or clean dish towels
Ingredients
Base vinegar: Choose any of these types of vinegars depending on the flavoring ingredients used:
- Distilled white vinegar
- Apple cider vinegar
- White wine vinegar
- Champagne vinegar
- Red wine vinegar
- Balsamic vinegar
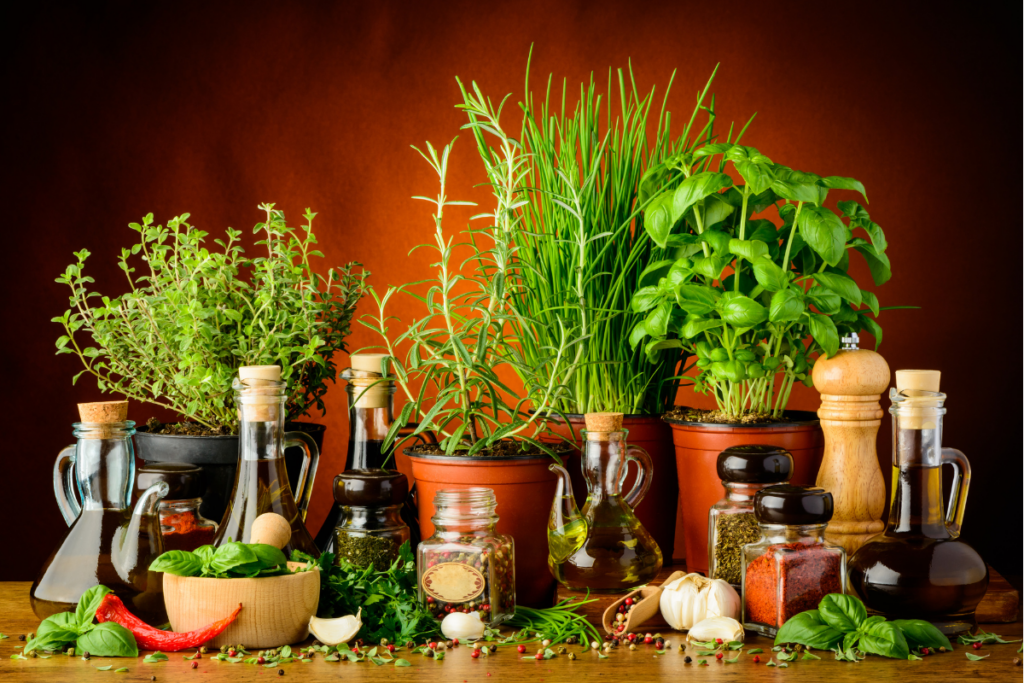
Flavoring ingredients: Common flavoring ingredients are listed
below. Choose any one, or a combination of ingredients, such as:
- Fresh herbs (mint, basil, tarragon, dill, parsley, thyme, rosemary, or sage)
- Dried herbs (bay leaves)
- Fruits (strawberries, raspberries, blackberries, blueberries, pears, peaches, orange, or lemon peel)
- Vegetables (jalapeños peppers, garlic cloves, or green onions)
Spices (cinnamon sticks, peppercorns, or mustard seeds)
Pre-Preparation
Containers
- Select containers.
- Use glass jars or bottles that are free of cracks or nicks and that can be sealed with a screw-band lid, cap, or cork.
- First bottling: Glass jars with a wide mouth are best for the first bottling because they allow for easy removal of flavoring ingredients.
- Final bottling: Any glass jar or bottle maybe used—and ideally one that allows for easy addition and removal of added ingredients such as herb sprigs or skewered vegetables.
- Use glass jars or bottles that are free of cracks or nicks and that can be sealed with a screw-band lid, cap, or cork.
- Wash and sterilize containers just before filling to ensure they are warm during bottling.
- Prepare a large saucepan of simmering water to sterilize the containers. (Water simmers at just below the boiling point and is characterized by gently rising bubbles that barely break the surface).
- Wash containers thoroughly with soap and water. Rinse. Submerge in the sterilizing bath and simmer for a full 10 minutes.
- Once sterilized, remove from the simmering water using tongs and invert on a clean surface or rack.
Lids and caps
- Two-piece metal or one-piece plastic home canning jar lids: Prepare canning jar lids according to manufacturer’s directions for canning.
- Non-corrodible metal or plastic screw caps. If using newly purchased screw caps, follow manufacturer’s directions to sterilize. If re-using screw caps, wash in hot soapy water, rinse and place in boiling water. Remove pan from heat and leave caps in the hot water until ready to use.
- Corks: Only use new corks. Using tongs, dip each cork in and out of boiling water 3-4 times just before bottling.
Vinegar
The type of vinegar used depends on personal preference and added ingredients. To ensure proper acidity for safety, use a commercially-produced vinegar.
- Distilled white vinegar is clear in color and has a sharp, acidic taste. It blends well with delicately flavored herbs like dill, mint, or parsley.
- Apple cider vinegar has a milder taste than distilled white vinegar and pairs nicely with fruit. Its amber color will influence the end color result.
- White wine and champagne vinegars have a mild, floral flavor and are generally more expensive than distilled white vinegar. These vinegars work well with tender herbs and lighter flavored fruits.
- Red wine vinegar is best paired with spices and strong herbs like rosemary.
- Balsamic vinegars tend to mask the flavor of fruits or herbs and are not as suitable for making flavored vinegars, but can be safely used if desired.
Herbs
- For best results, use only undamaged leaves and discard any brown parts of the herbs. For optimal flavor, home gardeners should harvest just after the morning dew has dried, selecting herbs that have not yet blossomed.
- Fresh herbs used for flavoring vinegar should be dipped in an antibacterial solution of water and bleach to reduce the risk of harmful bacteria making their way into the vinegar via the sprigs.
- Briefly dip the fresh herbs in a bleach solution of 1/2 teaspoon unscented household bleach per 3 cups water. Rinse thoroughly under cold water, and pat dry with a clean paper towel.
- Dried herbs, like bay leaves, may be substituted for fresh herbs.
- Ground herbs can be used but may cause cloudiness.
Fruits, vegetables and spices
- Thoroughly rinse all fruits and vegetables with clean water and remove peel if present. Small fruits and vegetables may be halved or left whole; large ones may need to be sliced or cubed.
- Strawberries, raspberries, pears, peaches, and the peel of oranges or lemons enhance vinegar’s taste and add color.
- Use the peel of one orange or lemon, or 1 to 2cups of fruit per pint of vinegar.
- Vegetables such as fresh garlic cloves, green onions, and jalapeños peppers can also be used to add flavor to vinegar.
- Thread these on thin bamboo skewers for easy insertion and removal.
- Whole spices such as stick cinnamon, peppercorns, or mustard seeds blend well with fruits and vegetables.
| Table 1. Vinegar Flavoring Amounts | |
|---|---|
| Flavoring Ingredient | Amount per pint (2 cups) vinegar |
| Fresh herbs | 3 to 4 sprigs |
| Dried herbs* | 3 teaspoons |
| Fruits | 1 to 2 cups Peel of 1 orange or 1 lemon |
| Vegetables | 1 to 2 cups |
| Spices | 1/2 teaspoon |
| *Ground, dried herbs can be used but may cause cloudiness. | |
Preparation
First Bottling
Wash hands and work surfaces well before preparing flavored vinegar to avoid cross-contamination.
- Start by heating vinegar to just below boiling.
- While the vinegar is heating, prepare fruits, vegetables, herbs, or spices:
- Lightly bruise the sprigs of cleaned fresh herbs, mint leaves, or fresh berries to release their aromatic oils and intensify flavor; this also shortens time for flavors to develop. On a clean cutting board or in a bowl, press firmly with the back of a clean chef’s knife, pestle, spoon, or muddler.
- Cut a small slit in whole jalapeños peppers or peeled cloves of garlic for greater release of flavor.
- Coarsely chop the herbs and fruits before placing in the bottles.
- Place the prepared herbs, vegetables, fruits, orspices in the clean, hot jars or containers.
- Avoid overpacking. Use the table below to select the appropriate amount of flavoring ingredient per pint of vinegar. (Double the amount of flavoring ingredients if making one quart.)
- Pour the hot vinegar over the flavoring ingredients in the jars. Leave ¼ inch headspace.
- Wipe rims of containers with a clean, damp cloth or paper towel. Place lids, corks, or screw caps and fasten tightly. Wipe outside of container if necessary and place in a cool, dark place.
- Allow at least 10 days for flavors to develop fully. The greatest flavor will be extracted after three to four weeks.
- After 10 days, test the flavor for development by placing a few drops of vinegar on plain bread or a spoon and taste. If the flavor has developed to your liking, proceed to the final bottling.
If the flavors need more time to develop fully, tightly seal the container and allow to rest for up to three to four weeks, sampling periodically until reaching desired flavor. - If the flavor of the vinegar tastes too strong after the standing time, dilute the mixture by adding more of the base vinegar that was used. Heat vinegar to just below boiling before adding.
Clean and sterilize containers and lids as before.
- After 10 days, test the flavor for development by placing a few drops of vinegar on plain bread or a spoon and taste. If the flavor has developed to your liking, proceed to the final bottling.
Final Bottling
Wash hands and work surfaces well before preparing flavored vinegar to avoid cross-contamination.
- Clean and sterilize containers and lids as before.
- Strain the vinegar through a damp cheesecloth or coffee filter into a clean container, one or more times, until the vinegar is no longer cloudy. Discard the fruit, vegetables, or herbs.
- If desired, add to the final bottling containers a new sprig or two of fresh herbs or berries that have been sanitized as described above.
- Pour the flavored, strained vinegar into containers and cap tightly.
- Label the prepared containers and/or note the date of preparation on your calendar to ensure they are used within a safe time period.
Storage
- Always keep flavored vinegar bottles tightly sealed to minimize the risk of spoilage.
- Flavored vinegar can be safely stored in the refrigerator for up to six to eight months or in a cool dark place (65°F or below) for up to three months. Refrigerate after opening.
- If you notice any signs of mold or fermentation (such as bubbling, cloudiness or sliminess) in your flavored vinegar, throw it away without tasting or using.
- After six months, even if there is no sign of spoilage, taste the vinegar before using to make sure flavor is still acceptable.
- If giving flavored vinegar as a gift, provide recipient with safe storage instructions.
NOTE: Flavored vinegar displayed in bright light or above 65°F for more than a few weeks should be considered a decorative item and may not be safe to consume.
Vinegar Recipes
Fresh Dill Vinegar
- 8 sprigs fresh dill
- 4 cups (1 quart) white vinegar
Wash dill and dip in solution of 1/2 teaspoon household bleach in 3 cups water. Rinse thoroughly under cool running water. Place dill in sterilized quart jar. Heat vinegar to just below boiling point; pour over dill.
Cap tightly and allow to stand in cool, dark place for three to four weeks. Strain vinegar, discard dill. Pour vinegar into clean sterilized bottles with tight fitting covers. Add a fresh sprig of cleaned and sanitized dill, if desired. Store in the refrigerator. Makes 1quart.
Herbal Vinegar
- 4 cups red wine vinegar
- 8 sprigs fresh parsley
- 2 teaspoons thyme leaves
- 1 teaspoon rosemary leaves
- 1 teaspoon sage leaves
Thoroughly wash herbs and dip in solution of 1/2teaspoon household bleach in 3 cups water. Rinse thoroughly under cool running water and pat dry. Place herbs in sterilized quart jar. Heat vinegar to just below boiling point before pouring over herbs. Cap tightly and allow to stand in cool, dark place for three to four weeks, shaking occasionally. Strain out herbs. Pour vinegar into clean sterilized bottles with tightfitting covers. Add a fresh sprig of cleaned and sanitized parsley, if desired. Store in the refrigerator. Makes 1 quart.
Raspberry Vinegar
- 1 cup raspberries
- 2 cups white or wine vinegar
Rinse 1 cup fresh raspberries under cold running water. Bruise raspberries lightly and place in sterilized quart jar. Heat vinegar to just below boiling. Pour over raspberries in jar and cap tightly. Allow to stand two to three weeks in cool, dark place. Strain mixture through a fine meshed sieve lined with cheesecloth into a 2-cup glass measuring cup, pressing firmly on the solids to extract as much liquid as possible. Discard solids. Pour vinegar into a clean sterilized pint jar. Seal tightly and store in the refrigerator. Makes 1 pint.
Strawberry Vinegar
- 2 cups fresh strawberries
- 3 cups cider vinegar
- 1/4 cup sugar
Clean strawberries, remove stems and halve; set 1/4cup aside. Place remaining strawberries in a large bowl. Pour vinegar over strawberries; cover and set aside for 1 hour. Transfer vinegar and strawberries to a large sauce pan. Add sugar, bring to a boil. Reduce heat and simmer, covered, for 10 minutes. Strain mixture through a fine meshed sieve lined with cheesecloth into clean container, pressing firmly on the solids to extract as much liquid as possible. Discard solids. Pour vinegar into a clean and sterilized quart jar .Add reserved strawberries. Seal tightly. Store in the refrigerator. Makes about 1 quart.
References
- Andress, E.L. and Harrison, J.A. 2000. Preserving Food: Flavored Vinegars. FDNS-E-1. University o fGeorgia Cooperative Extension Service, Athens, GA. Available from: https://nchfp.uga.edu/publications/uga/uga_flavored_vinegars.pdf.
- Bakir, S., Dilara Devecioglu, Selma Kayacan, Gamze Toydemir, Funda Karbancioglu-GulerEsra Capanoglu. 2017. Investigating the antioxidant and antimicrobial activities of different vinegars. Eur Food Res Technol. 243:2083. https://doi.org/10.1007/s00217-017-2908-0
- Hoover, A. And Burgess, L. 2019. Flavored Vinegars. HGIC 3470. Clemson Extension, Clemson, SC. Available from: https://hgic.clemson.edu/factsheet/flavored-vinegars/
- Savoie, K. 2014. Let’s Preserve: Herbal Vinegar.The University of Maine Cooperative Extension,Orono, ME. Available from: https://extension.umaine.edu/food-health/food-preservation/lets-preserve-herbal-vinegar/
*D. Grubb, MS, FSHN Graduate Student, E. Shackelton, Extension Specialist, M. Bunning, Extension Food Safety Specialist and Professor, CSU Department of Food Science and Human Nutrition. (Revised from P. Kendall and J. Rausch, 2012. Flavored Vinegars and Oils, CSU Extension.) 1/21.
Colorado State University, U.S. Department of Agriculture, and Colorado counties cooperating. Extension programs are available to all without discrimination. No endorsement of products mentioned is intended nor is criticism implied of products not mentioned.