
Did you know…
- Roasting chile peppers slowly over a flame caramelizes sugars and adds distinct flavor to the final product.
- Peeling the skins is easiest after peppers are placed in a covered container or food grade plastic bag following exposure to heat, which captures the steam being released from the roasted peppers.
- For safety and quality, roasted peppers should be completely cooled on ice or in the refrigerator to less than 40°F within 2 hours following exposure to heat, and then used or frozen within 3 days.
Chile peppers add unique flavors to foods and can be used in almost any type of dish, including salads, entrees, breads, or even desserts! Whether you prefer mild or hot, you can select and process chiles to add an element of creativity to your meals. In addition to adding flavor, chiles also contribute vitamins A and C and fiber.
Selection
Choose fresh chile peppers that are mature, heavy for their size, and firm. Avoid processing peppers that have soft spots or bruises with mold or decay.
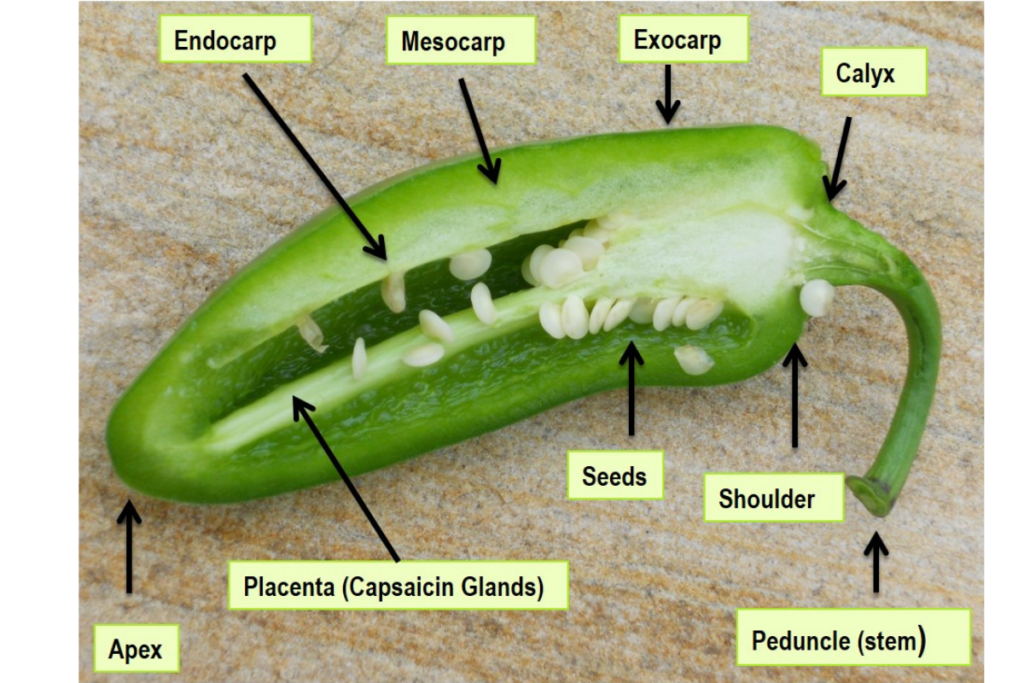
Anatomy of a Chile
The chile consists of an outer skin that is usually removed in processing, the fleshy part of the fruit, an inner wall, ribs, and seeds. The inner membrane and ribs of the chile where the seeds are attached contain capsaicin glands. Removing the inner ribs will reduce the ‘heat’ of the chile.
Handle Chiles Carefully!
When working with chile peppers, wear gloves and glasses to protect your skin and eyes from possible contact with the capsaicin oil–the source of heat found in chiles.
- If you wear contact lenses, you may want to remove them before processing hot chiles.
- To remove capsaicin from your skin, rub the affected area with olive or vegetable oil, wipe off with a paper towel, and then wash thoroughly with plenty of soap and water and dry with a paper towel.
- This is especially important before engaging in other activities where your hands may touch your skin or eyes!
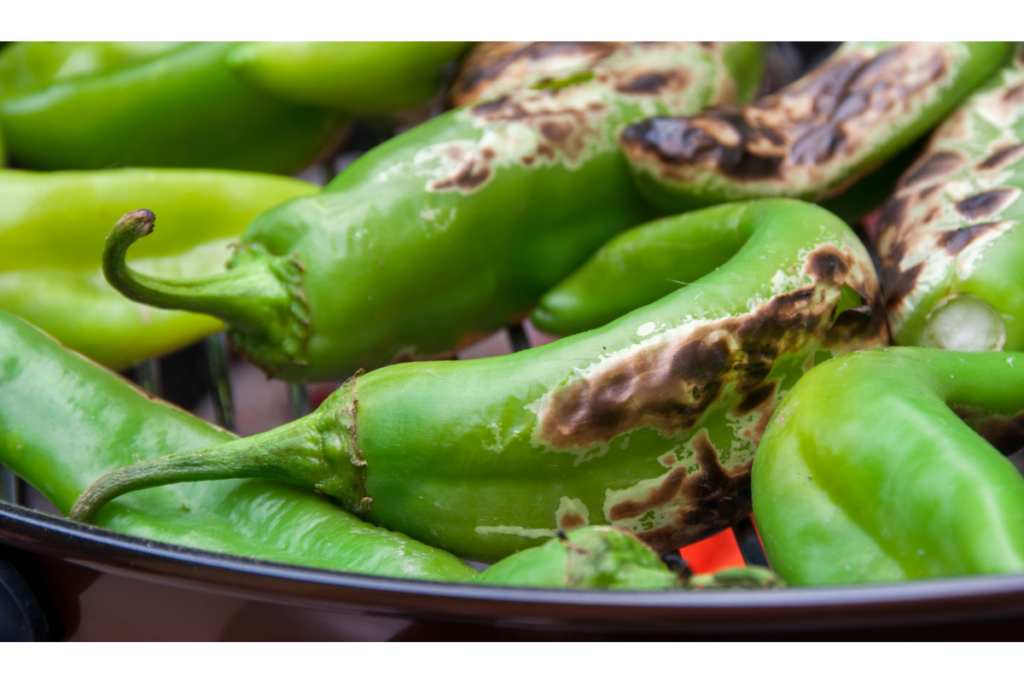
Blistering Chiles to Remove Skins
There are several ways to blister pepper skins for easy removal.
- Fire-roasting, microwave oven heating, or any other source of high heat applied to the peppers will cause the skin to blister.
- Roasting slowly over a flame caramelizes sugars which adds distinct flavor to the final product.
Peeling Chiles
- Peeling the skins is easiest if the peppers are placed in a covered container or plastic bag (food grade) following exposure to heat, capturing the steam being released from the roasted peppers.
- Once cooled, the blistered skins should pull off the chiles with a gentle rubbing and rinse with water.The skins can also be removed by scraping with a sharp knife.
- Whole roasted chiles can also be frozen unpeeled and are easier to peel after thawing.
Commercially-Roasted Chiles
When commercially-roasted peppers are not chilled and/or frozen in a timely manner, harmful bacteria can produce toxins or multiply and grow to unsafe levels causing foodborne illness.
- The roasted chiles should be packaged and sold in a food grade plastic bag (not a trash bag) or other food-safe container.
- Promptly transport chiles home in a cooler with ice or cold packs.
- Divide into small batches for quicker cooling.
Packaging
For safety and quality, roasted peppers should be completely cooled on ice or in the refrigerator to less than 40°F within 2 hours following exposure to heat, and then used or frozen within 3 days.
- To freeze chiles for long-term storage, pack peeled or unpeeled peppers in plastic bags, heavy aluminum foil or freezer wrap; remove air; seal.
- Chiles can also be frozen whole or diced, in rigid containers of glass, metal or plastic–leaving 1⁄2 inch of head space for expansion.
- Label and date packages/containers.
Freezing Roasted Chiles
Freeze roasted chiles to 0⁰ F or below immediately after packaging.
- Put no more food into the home freezer than will freeze solid within 24 hours (approximately 2 to 3 pounds of food for each cubic foot of freezer space).
- Leave space between packages to allow for proper air circulation in the freezer.
- For best quality, use frozen chile peppers within 1 year.
Canning Roasted Chiles
The only way to safely can chiles and other low-acid foods at home is by pressure canning.
- Always use tested recipes and the recommended method and instructions provided for your elevation. Tested recipe sources include:
- The University of Georgia Cooperative Extension ‘So Easy To Preserve‘
- Ball Blue Book Guide to Preserving (2020)
- CSU Extension Preserve Smart app/website
- A free online home food preservation tool featuring a function that adapts recipes to the user’s elevation, as well as a navigation feature enabling exploring a variety of safe preservation methods for over 55 fruits and vegetables.
- Have your pressure canner inspected annually to ensure the gauge is accurate. Contact your local Colorado State University Extension office to see if this service is offered where you live.